

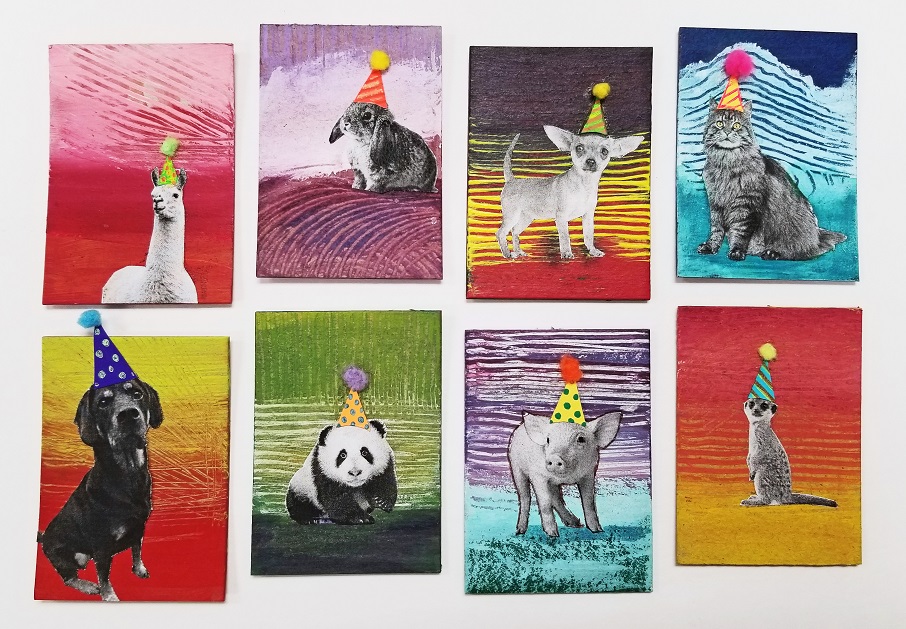
In this tutorial, we share how to use our Kraft Artist Trading Cards to make Party Animals! This is a super creative way to turn chipboard into a fun and entertaining work of art. You can choose to use your own pet, or any favorite animal you have.
Download a printable version of this activity here so you can easily follow the steps and the design!
Party Animal Tutorial
Below is the step by step tutorial on how to make a Party Animal. We used a rabbit as an example, perfect for Easter coming up in April! 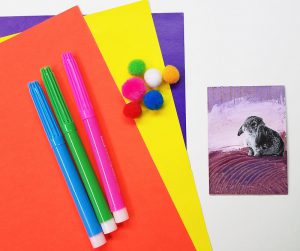 You can personalize this craft any way you’d like.
Materials:
- Kraft Artist Trading Cards
- Acrylic paint or Tempera paint
- Colorful paper
- Markers
- Pom poms
- Scissors
- Glue (gluestick or tacky glue)
Step 1: Choose an animal you want to use for your design. You can print black and white clipart photos, or use a photo of your pet. Scale the image to be about 2 inches long and wide, so that it fits on the 2.5” x 3.5” chipboard. Print and cut out the image, then set it aside.
Tip: Use an image of an animal that is facing foward and will look good with a party hat!

Step 2: If you know you would like to add some fun line designs to your background like in our examples, you can use another piece of chipboard or cardstock paper and cut the edges to use in Step 3.

Step 3: Create an abstract background on your chipboard using acrylic or tempera paint. Overlap colors to add variety. Before the paint dries, use your chipboard from Step 2 to slide over the paint and make designs, like rolling hills or an intricate sky. Let the paint dry.
Tip: If you layer the paint colors, once you “comb” over the chipboard with your jagged edges, the color underneath will show through!

Step 4: Make the party hat for your animal using colorful paper and a pom pom. Cut a triangle out of colorful paper, then use a mini pom pom or cut a small piece off of a larger one. You can choose to draw on the hat with marker to add more designs. Glue the pom pom to the end of the hat.

Step 5: Glue the animal clipart or photo you chose from Step 1 onto the chipboard, then glue the party hat on. Now you have a Party Animal! You can choose to add a magnet to the back to display it, punch a hole at the top and hang it, or make it a gift.

Share how your Party Animal came out in the comments below!


Pingback: October Daily Holidays & Observances Printable Calendar - S&S Blog
Pingback: Coronavirus Activity Guide - 45 Boredom Buster Ideas For Kids - S&S Blog
Pingback: 10 DIY Llama Crafts & Projects For Kids - S&S Blog