

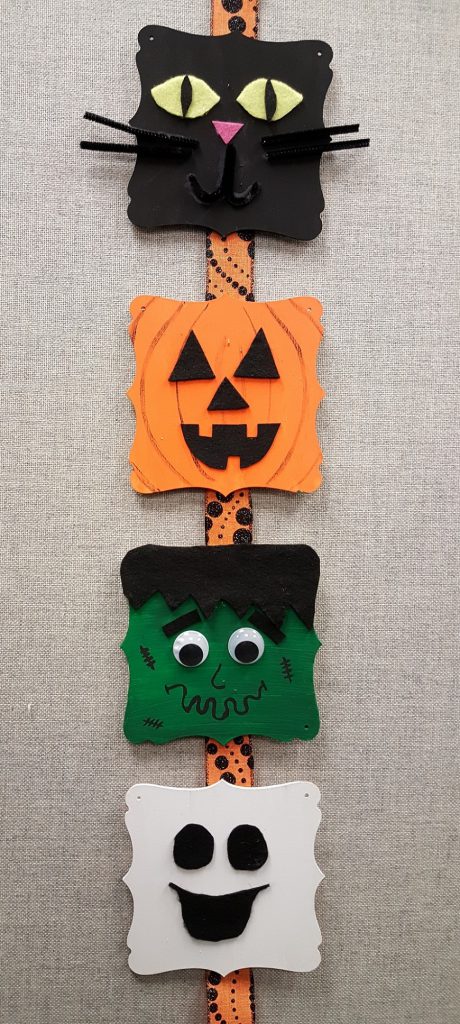
Celebrate Halloween with your favorite spooky characters! This DIY hanging decoration is easy to make, and you can personalize it with your own designs and ideas. Hang the finished project on your classroom door, in your activity room, or at home!
Materials:
- 4 Wood Plaques
- Acrylic paint
- Felt
- Black pipe cleaners
- Wiggly eyes
- Black marker
- Decorative ribbon
Cat: Paint the plaque with black acrylic paint. Cut out eye shapes using felt in the color you chose (we picked yellow) and slivers for the black in the center, then cut a pink triangle for the nose. Cut one black pipe cleaner into pieces for the two sets of whiskers, and also for the mouth. Glue the shapes to the plaque.
Pumpkin: Paint the plaque with orange acrylic paint. Cut eyes, a nose, and mouth using black felt. Feel free to get creative with your pumpkin face! Glue the shapes to the plaque. You can also add a few lines with black marker to represent the grooves in a pumpkin.
Frankenstein: Paint the plaque with green acrylic paint. Cut out a section of black felt for the hair and eyebrows. Glue them to the plaque. Draw a nose, mouth, and stitches with a black marker. Then glue on the wiggly eyes!
Ghost: Paint the plaque with white acrylic paint. You may need a double coat. Cut out circle shapes for the eyes and a mouth using black felt. Glue them to the plaque.
Once you have all of your plaques decorated how you like them, you can attach them to a ribbon to make a hanging decoration! Use either a stapler or duct tape to attach the plaques. Hang it in your activity room or the entrance way to your organization!
The wood plaques do have holes in the sides, so you may decide to hang them up separately using jute string.


Love the easy project you have shown. I will be able to do this with grandchildren 2-7 years old.
Also inexpensive Yeah! Do you have similar designs for upcoming Christmas?
Hi Linda, so glad you like this craft idea! That is a great idea to use the plaques to create Christmas characters, we will add that to our craft list. We do have several Christmas crafts on our blog: https://www.ssww.com/blog/?s=christmas+craft&submit=Search