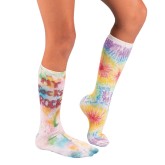
Tie dye is such a fun activity because you can experiment with so many different colors and patterns. There are different techniques using string and rubber bands, as well as different patterns of folding and swirling your fabric. It is important to have a plan when tie-dying and to know best practices to get the beautiful, vibrant creation that you and other participants desire.
Below we have tips and tricks for tie-dying as well as some of our top suggestions for things to tie-dye. If you want to see our tie dye experts at S&S in action, we suggest you watch our Introduction to Tie Dye video.

Two helpful tips are to wear gloves to avoid dye on your skin and to make sure that you secure all folds when making the pattern. Regardless of which method you use, material will expand when it is wet, so making sure to tie each fold to secure the dye in place. Get it – tie dye!
 |

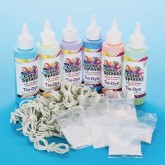
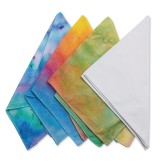
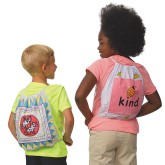
Our experience with tie dye is that natural fiber fabric will hold more dye, leading to a brighter, longer lasting result. You can use some of our 100% cotton shirts or even other fun items we have available like scarves, bandanas, and draw string bags. Pre-wash the materials if you can, for sizing purposes and to remove any dirt so that the dye saturates better (do not use fabric softener or dryer sheets, which can leave a residue).
Important Tip: If you pre-wash (recommended), there is no need to dry your garment. You want the fabric to be wet (but not dripping) when you tie and dye.
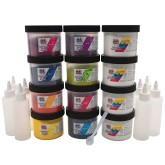
In order to ensure a colorful, vibrant tie-dye, there are two factors that need consideration; color choice and color saturation. In order to avoid a large amount of white on your finished product, the trick is to squirt enough dye into the folds. Squeeze the area saturated with dye to insure color saturates the inside layers of fabric for a bold result. When choosing colors to place adjacent to each other, remember the color wheel. Do not place“opposite” colors next to each other, such as red near green, blue near orange, or yellow near purple: the results would be a brown, muddy mess. If you really like bright colors avoid placing a color with red mixed in it, such as purple, near green.
Fun Color Combinations: A lot of fuchsia and a little yellow make red. Red and yellow make orange. Yellow and turquoise make green. A lot of turquoise plus a little fuchsia makes blue. Turquoise plus fuchsia makes purple.
• Vertical/Horizontal Stripe: Fold a piece of fabric in vertical pleats, and you’ll end up with horizontal stripes.Horizontal pleats result in vertical stripes. Diagonal pleats are an option for diagonal stripes.
• Bullseye: For concentric circles, grab the cloth where you want the center to be, and pull, until you’ve more or less made a long tube of garment, then apply rubber bands at intervals along the fabric.
• Classic Spiral: Lay the garment on a flat surface, smooth out all the wrinkles, then make a small pleat right across where you want the center to be. Grab the very center of that pleat with a clothespin, and begin to twist. As you twist, pleats appear farther away from the center; as these pleats get too large, split the pleats with your hands, keeping each fold the same height above the table, no more than one to two inches in height.
• Circles: Another technique is to use small rubber bands to pinch and bind fabric in several places all over the garment. This will make circles of color.
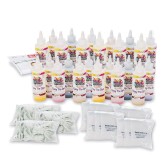
See our Color Splash Easy Tie Dye Kit for even more detailed information on tying tips!

Always add powder dye to empty squirt or spray bottles first and then add water.
Be careful when you measure out the dye. Leave the jars open as short a time as possible and use a face mask. Don’t breathe in the dye powder! Replace the bottle cap and shake until dye is fully dissolved. For best results apply dye to fabric within 30 minutes of mixing. If you're dye calls for a solution of sodium carbonate (soda ash), pre-soak the fabric for fifteen minutes to one hour in the solution. Mix one cup per 2 gallons of water to make soda ash. Many of the dyes that S&S offers have the soda ash pre-mixed in. Details on the product page will tell you, or you can call us and ask.
Before folding and tying your project, rinse or soak in warm water and wring out so the item is not dripping. Damp fabric will absorb the dye much more easily. Once you have your fabric folded/tied, lay the garment on a plastic protected surface. Squeeze the dye directly into the fabric, checking to make sure dye has penetrated into the folds. Squeeze the area you just applied dye to so it gets into the folds. Flip over and repeat on the other side. Seal the dyed fabric in a plastic bag to keep wet.
How long should you wait? Make sure that the fabric stays wet for the reaction to take place. It should be kept in the plastic bag for 12-24 hours.
Carefully cut any rubber bands making sure not to snip your fabric. Rinse by hand in cold water before machine washing to release excess dye from the fabric, then again in the hottest water available to remove any trace of the un-reacted dye until the water runs clear. Now your garment should be ready for the washing machine. Wash and dry separately for the first few washes.


 Live Chat