

We are all about MakerSpaces here at S&S and have been immersing ourselves in the concepts and ideas surrounding them. We even have a dedicated MakerSpace Shop! I find it fascinating that there are so many options for a MakerSpace and so many wonderful opportunities to get students engaged in learning and problem solving. If you have decided to create a Space in your school or program for tinkering, we have some tips below for how to start today!

Tips to Start Your MakerSpace Today
Keep in mind that these tips are for beginner MakerSpaces and to get started with “basic” and guided projects. Teachers, librarians, and program directors that are looking to introduce children to the Maker concept, will be starting with some of these ideas. As your MakerSpace develops and the Makers using it become more advanced, you will progress your activities and the tools and materials you use.
- Ask for tool and material donations. This is the easiest way to begin supplying your MakerSpace. Hammers, measuring tape, nails, screw drivers, etc. Provide a list to parents and community partners of items you are looking for. It helps to have a few specific projects in mind, so that you can get started after you begin collecting. Keep your list updated as you move forward with your MakerSpace.
- Collect sturdy cardboard boxes. Many starter MakerSpace projects involve creating something from a box or using materials on hand to create something.
- Gather inspirational quotes to hang in your MakerSpace area to encourage students and inspire those involved.
- If you are in a school setting with other classrooms or programs, create a donation box for additional materials that other teachers or program directors may not need. Broken crayons, mis-matched markers, scrap paper. All of these things could be used in your MakerSpace.
- Use plastic bins to organize your materials so that when you begin to build your MakerSpace you will not be overwhelmed. As you gather and purchase materials, research project and activities using those items so that you will be prepared.
- Try not to be overwhelmed with the technology involved in some MakerSpaces like 3D Printers, Robotics, and Coding. If you decide to bring these technologies into your MakerSpace further down the road, there are many support tools and trainings. Our team at S&S supports our customers all the time with getting their Imaginator 3D Printers set-up and training JD the EZ Robot as well.
6 MakerSpace Tools for Beginning a Your Space

Duct Tape
Especially if you are just starting your MakerSpace, introducing concepts of tinkering to students, you will want to make sure you give them different options to use when building their creations. Duct tapes with patterns also allow a creative flare to be added and will spark the interest of someone who may have just chosen glue otherwise. Check out our assortment of Duct Tape here.

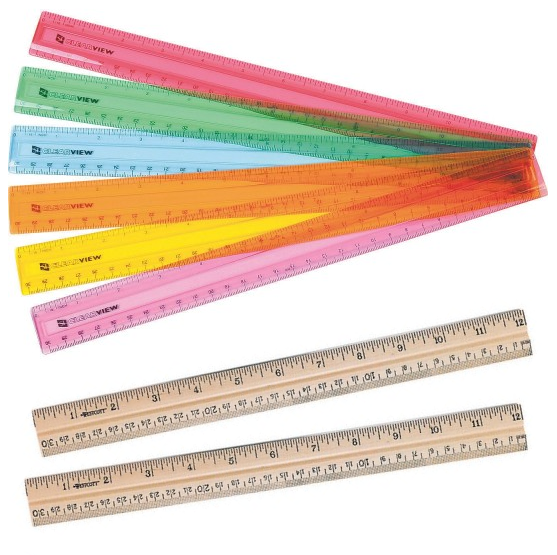
Rulers
I know this seems obvious, but make sure to provide a handful of rulers, and measuring tape. As Makers get use to the idea behind tinkering, they will become more advanced with their creations and need to include correct measurements on some of their masterpieces.
Glue
An assortment would be best. If a hot glue gun is appropriate for the age of children then consider one or two of those in addition to glue sticks and regular glue. We sell an assortment of glues at S&S from glitter glue to bulk, take a look here at your options. Again, options are great to have for your Makers to encourage them to try different tools, and find out which ones work best for their creation.

Hook & Loop
I love this option because it allows you to reuse materials if needed, while also allowing room for Makers to try something by hook and loop, while not committing to a more permanent solution like glue. This is great for teaching problem solving and trial and error. I’ve seen a lot of uses for this item with craft stick projects, and also for developing alternative uses for Maker creations. If a section of a build is hook and loop, it can then be broken down to move, or even placed in another area to create a different function. There are assortments of options out there, you can see some of ours here.

Scissors
Again having scissors is a no brainer for a MakerSpace. Just make sure to provide enough pairs for multiple students to be able to use them at the same time. You don’t want to discourage Makers because they didn’t have what they needed for their project, and scissors will almost always be needed for beginning MakerSpace building projects.

Pencils
Being able to erase while making measurements and drawing up plans is essential. Make sure to have an ample amount of pencils and pencil sharpeners in your MakerSpace.

Kid Inventor Activity Ideas

- Make a box into a game using the following materials:
- duct tape
- craft sticks
- wood pieces
- straws
- glue
- markers
- Create a trash pickup device using materials in your Makerspace. Schedule a community cleanup event where kids can use their inventions.
- Have kids gather recycled materials throughout the week, then create something functional using these materials.
- Use various items in your Makerspace to create an “instrument” of some sort. Kids will then perform a song at your local library or senior center.
Do you have any other favorite MakerSpace tools?


We have find your article very useful and reliable for lots of content readers so please write more on other topics too.