

Add some STEAM to your PE or recreational program! Challenge students to work together to create a sled using cardboard and duct tape, which they will then use to race the other team through a simple track or obstacle course. This is a great team building activity and can even be used for your upcoming Field Day events.
To Get Started:
- Divide students into teams of 4-7
- Determine if you are going to use a Team Pull Hardness or a Rope for students to pull the sleds.
- Each team can determine how their sled will be pulled. Teams can have the rider of the sled simply hold onto the harness or rope, or the harness or rope can be secured to the sled.
- Each team is given the materials below.
Equipment for Students:
- Cardboard – (about 2’ x 4’)
- Duct Tape
- Felt Fabric (about 1’ x 2’)
- Scissors
Accessories for Activity:
Production Process
An example of a sled is below, or you can download this easy printable to show students if you would like.
Design – Teams should be given a short period of time to discuss and or sketch out their design (10 to 15 minutes). This is a great time to see if the teams can work together and plan out what they will build and perhaps assign task to specific teammates. You may choose to pass out some Design Considerations and Rules to students to help get them started.
Build – After the design period, teams should be given another period of time (20 to 30 minutes) to build their design.
Test – Allow teams about 5 minutes to test out their design to see what changes and improvement they want to make.
Redesign/Rebuild – Allow teams another 5 minutes to modify their sled if desired.
Design Review – Before racing, all the teams can review all the designs and discuss cool features, which teams design they think is structurally the best and which looks the best. They could even vote on the best-looking design.
Race – Create a race course around which each team member must be pulled. Use cones and other obstacles if you’d like. A course with curves or an oval “track” will provide the most challenge. Time how long it takes each team to pull each team member on the sled around the track. If a rider falls off a sled or any part of their body touches the ground for more than a split second, that team and rider must pick up their sled and start that person’s ride again. If a sled breaks during the race, teams can fix their sled. The time that it takes to fix their sled is counted in the total race time. Any team member that was riding on the sled when it breaks must return to the start of the course and complete it in its entirety.
Variations: To add a challenge, don’t limit it to one rider at a time on the sled, but also don’t specifically tell teams that they can have more than one rider. This will allow some team or teams to think outside the box and try multiple riders at once. They may learn that they can’t pull 2 or more riders at once or that their sled won’t support multiple riders.
Example of How to Make a DIY Sled
Step 1: Gather materials

Step 2: Round off the corners of the front end of the cardboard. Spread out your felt fabril roll.

Step 3: Roll front lip up and apply tape to the top side of the cardboard to lock in up position. Apply more tape to cover the whole front.

Step 4: Flip the cardboard over so you are working on the bottom. Cut the felt slightly less than the width of the cardboard, then secure front end of the felt to the angled portion of the lip. Secure the sides of the felt with duct tape.

Step 5: Slide a piece of duct tape under the long section of the felt, sticky side up, with half stuck to the large piece of the felt and half exposed. Cut a smaller piece of felt to cover the back end of sled. Apply the smaller piece of felt to the sticky part of the tape from the previous step. Tape over the edges.

Step 6: Cover the remainder of the exposed cardboard on the bottom with duct tape.

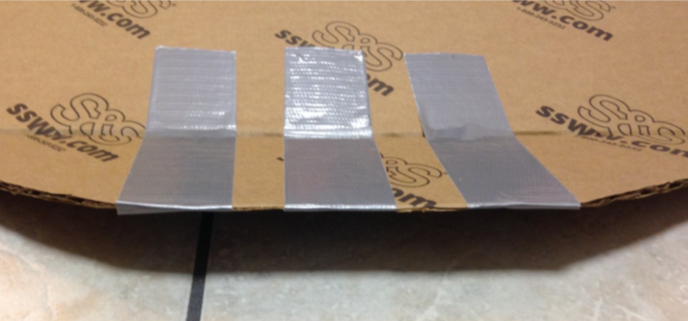
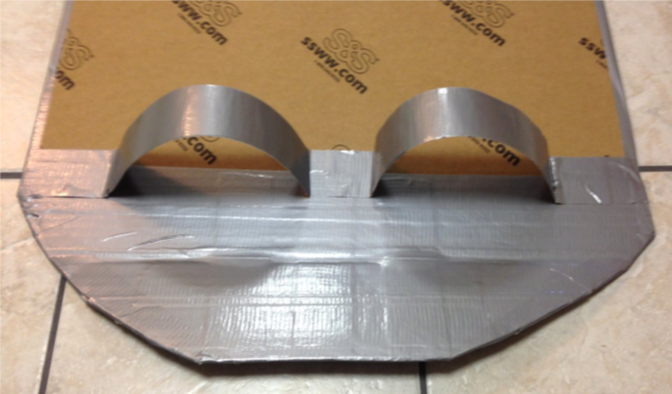
Step 7: Add foot loops made from sections of tape that are stuck to one another so that neither side is sticky, form loops and tape to front end of sled.
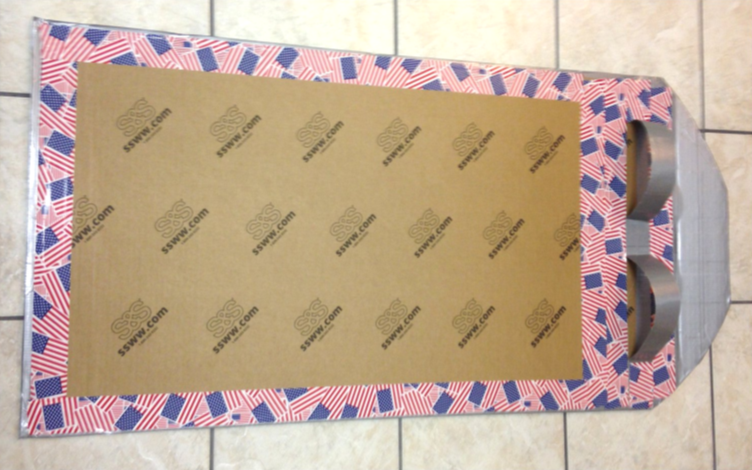
Step 8: To jazz up the top of your sled, use different styles of duct tape.
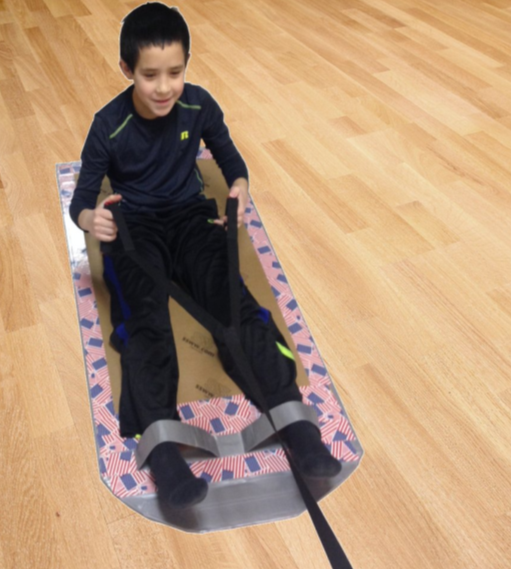
Below is a photo of the finished sled being used by a student on the gym floor. As an alternative if you do not have a gym to use, you can change the design for carpeted floor by using 100% duct tape for the bottom of the sled. Then add a section of fabric on the top for comfort and to help prevent the rider from slipping off.

Outdoor Snow Version
If you have snow on the ground and a small hill, this activity can easily be adapted. The teams would now race their sleds a certain distance down the hill instead of pulling it around. The Design and Build steps would remain the same and could be done indoors or outdoors. The Test phase could allow for a single run down the hill and the time for the Redesign phase could be extended a little to allow team to return inside. The Race would require each player on each team to ride down the course and pull the sled back up to the starting point to their next teammate.


I think that this is a wonderful idea! I can’t wait to try it with my Girl Scout Troop! Thank you for the wonderful idea and detailed information.
I’m suggesting you rethink the use of American flag tape. It is improper to sit on a flag and improper to drag the American flag on the ground, which are 2 purposes of the game.
Hi Julie, we certainly didn’t mean to offend anyone or use the American Flag in an improper manner. We saw it as adding a bit of patriotic spirit to this DIY sled design. But we appreciate your feedback, and anyone who likes the idea can choose to use regular duct tape or even themed colors for their school or organization!