

 Make this watermelon craft in just 5 easy steps! These are fun for kids to make at summer camp. You can also use this for a summer party decoration or just to spruce up your home for the season.
Materials:
- Acrylic Paint (mix white and dark green to get light green)
- Color-Me™ Bisque Plate with Easel
- Paintbrushes
Watermelon Craft Tutorial
Step 1: Dip a flat paintbrush in the light green paint first, and paint squares that are 1 inch thick and go a little more than half an inch down the plate. Leave a space that’s 1 inch thick between each square for the dark green paint. Let it dry for about 10 minutes.
Step 2: Now you can add the dark green paint. Repeat Step 1, painting in between the light green squares. Let it dry.
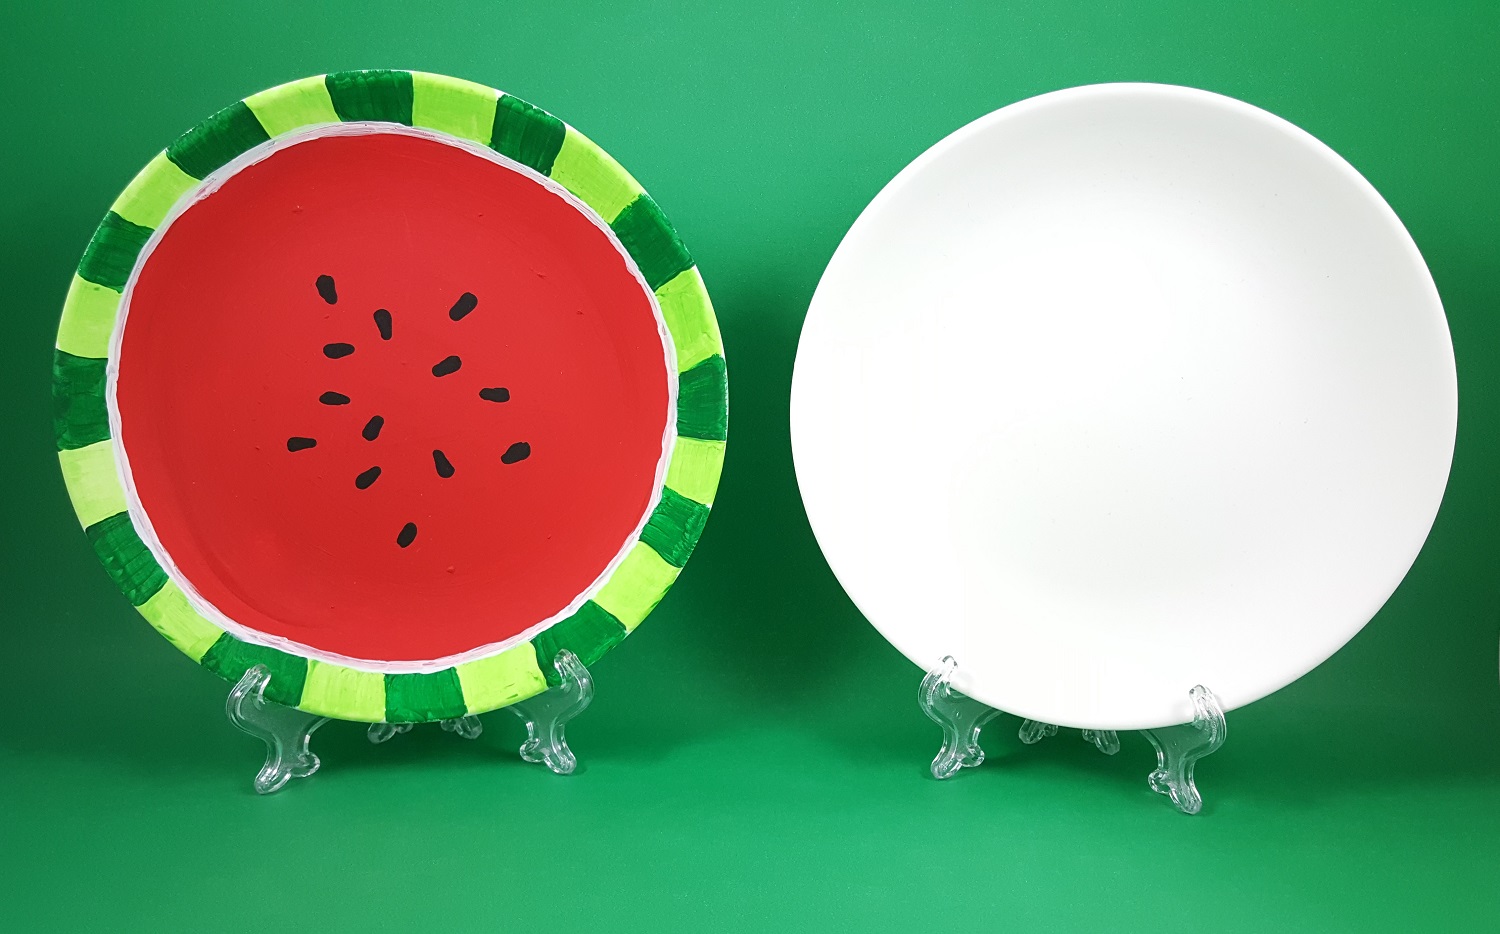
Step 3: Using red paint, color in the entire middle of the plate, and up to where your green squares end. Let it dry.
Step 4: Now add a white ring between the green squares and the red center. You may need a few coats for this.
Step 5: Paint the seeds in the center with a small dab of black paint for each. You can add as many seeds as you’d like! Use a finer tipped paintbrush for this.
Now you’ve turned an ordinary white plate into an adorable watermelon. The plates also come with an easel so you can display your artwork. And remember, it’s for decorative use only!


I will be doing this activity next week.
Pingback: July Daily Holidays & Observances Printable Calendar - S&S Blog
Pingback: August Daily Holidays & Observances Printable Calendar - S&S Blog